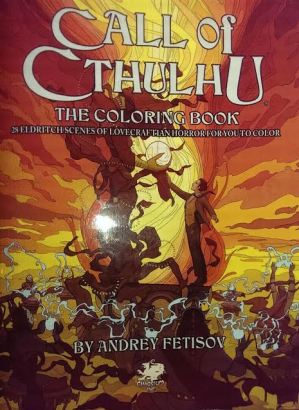
Feature image from the inside front cover of Call of Cthulhu.
I read a lot of faerie tales and myths as a kid (okay, I still do), and was particularly into the HP Lovecraft inspired Cthulhu Mythos for quite a while as teen. As an adult, I especially enjoy reading other authors playing in that sandbox cos I legit love the idea of shared universes that anyone can write in.
When a rep from Chaosium asked if I would be interested in receiving a review copy of their Call of Cthulhu colouring book, I jumped at the chance. HELL YES, I WANT TO COLOUR GREAT OLD ONES, AYFKM?! So, yes, I received a free copy of this colouring book in exchange for an honest review.
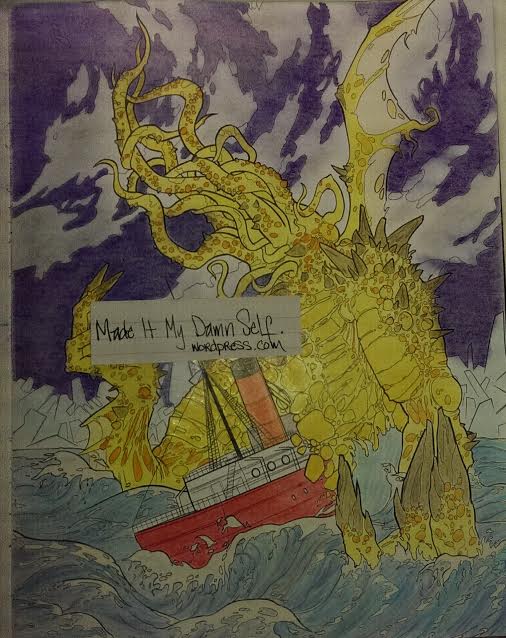
What I liked: The illustrations in this book are GORGEOUS. Artist Andrey Fetisov has done an outstanding job bringing these stories to life in ways that are legitimately fun to colour (click here to see more of his work).
I like the fiddly little detail work, especially with fine-tipped pens (<.3mm or GTFO, amirite?) and there’s a lot of this. Even though it’s the size of a normal colouring book, you’ll find yourself getting lost in the intricacies on the page for hours. I coloured one page, and spent more than a week doing so, probably around 18-20 hours total? So, for someone like me, this is a huge bonus.
The book is bound with staples, so it’s super easy to get it to lay flat. I didn’t have any problems with the ink smearing when I used lighter colours or a blending pencil. Love that.
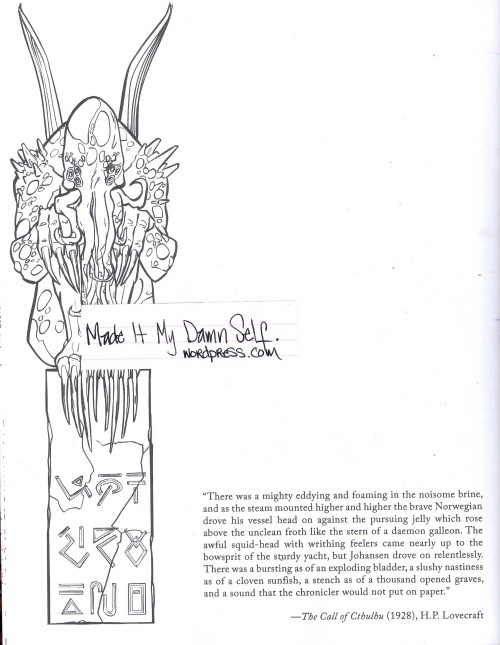
Image of a mostly blank opposite page–helpful for when the pens bleed through.
I also really dug the fact that opposite the main page is a mostly blank page with a smaller illustration and a quote that inspired the page you’re working on. This was great, not just for inspiring ME, but also because it meant I didn’t really have to worry too much about using pens or markers, cos the paper was thin enough that they’d definitely bleed through. Which brings me to…
What I didn’t love: The paper is thin. If it weren’t for those mostly blank backs of the pages, I’d have loved it a lot less than I do. I’m only considering this a minor nitpick. What bothered me slightly more about the paper is that it’s not a whole lot different than what I use in my printer at home. I found that it would only accept so many layers of light colour before it just wouldn’t take any more, which made me wish I had pressed harder to begin with. Still not a huge deal, since I print shit out at home to colour all the time, you know?
Iä! Iä!
Would I recommend it: Hell yes. Especially if you’re a fan of the Great Old Ones. Or even if you’re not and are looking for a colouring book with more of a horrory madness vibe than a lot of other stuff that’s out there. I’ve looked at a ton of horror colouring books and most of them look amateurish, or they’re printed with terrible ink that makes it impossible to colour them.
You can head over to Chaosium and purchase it here. If you buy the physical colouring book, you get a free PDF copy, which is pretty awesome (in case you want to practice or test colours or even use a different medium).
Y’all, I love marble. I really do. Does that make me basic?
Just kidding, I don’t care if I’m basic.
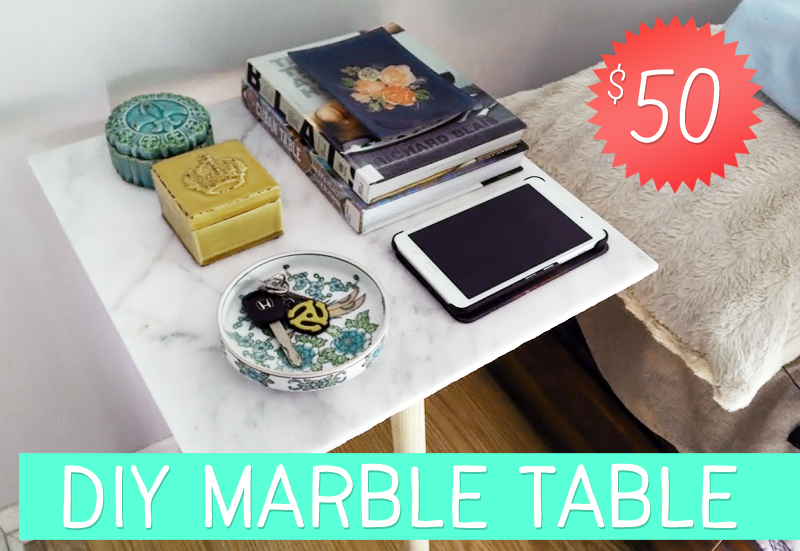
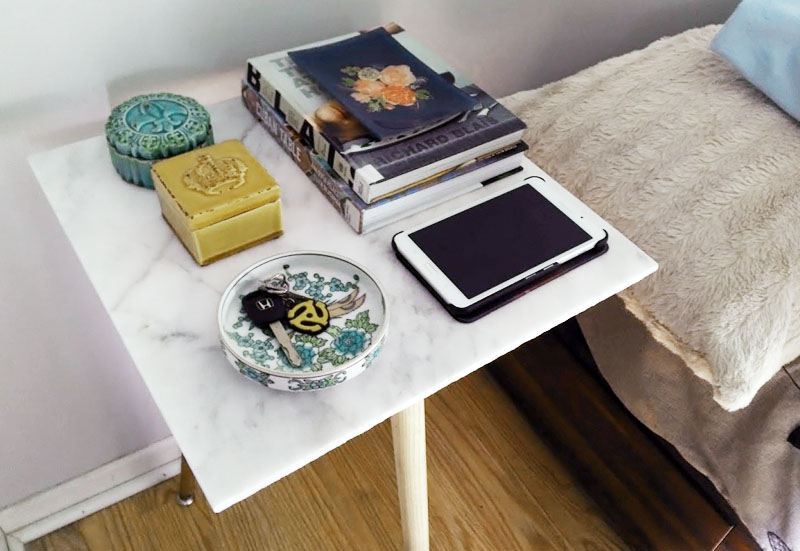
I needed a table for my bedside and I wanted a marble table a whole lot. I also wanted not to pay over a hundred dollars a whole lot. We have been looking idly at tile recently, in preparation for an upcoming tiling project, and I thought, “Hey, tile comes in marble and also square shapes, I could make a table out of one of those maybe.” So I did.
What I bought:
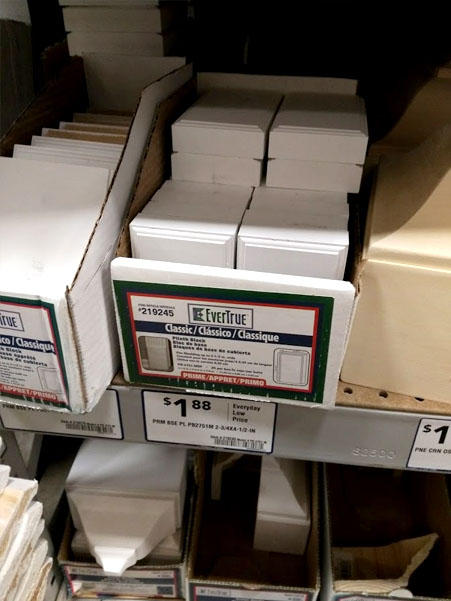
– an 18″ x 18″ marble tile from Floor & Decor, $9.50 (ish). I’m pretty sure I bought this one.
Note: Lowe’s, Home Depot, and Menard’s did not carry the 18 inch size of marble tile in their store, nor did The Tile Shop; it may take some looking around to find one if you don’t have a Floor & Decor nearby. I did find a porcelain tile at The Tile Shop that I almost used, and that would be okay in a pinch. You could also affix smaller tiles or mosaic tiles to a board, if you like that look; this would require some grout. Maybe some sweet metallic or other color grout. You could use crown molding or picture frame molding to make a decorative edge. It also doesn’t have to be a tile; you can find round marble trays or lazy Susans that you could convert to a table top, though they’re more expensive than a tile.
This basic construction method would work with all kinds of table shapes. If you wanted a different size or shape, you would just need to figure out how the legs would work. A perfectly symmetric round or polygonal shape would be the same idea, but you might want to peep some oblong or rectangular tables on Google Images if you wanted to do a longer shape. Or add a fourth leg.
– 3 table legs, $3.63 each, $10.89 total
– 1 can gold spray paint, $5.98. I used maybe $2 worth painting the legs.
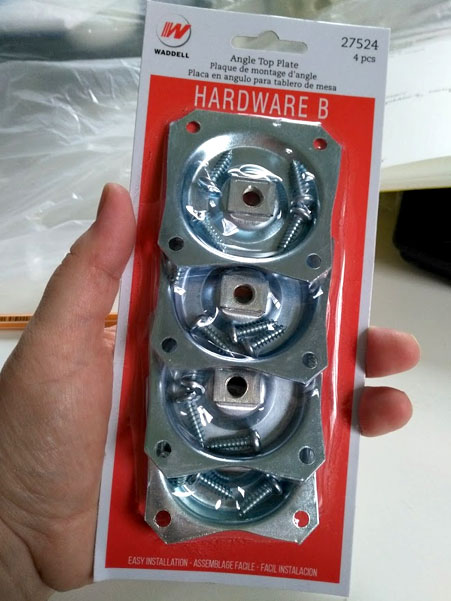
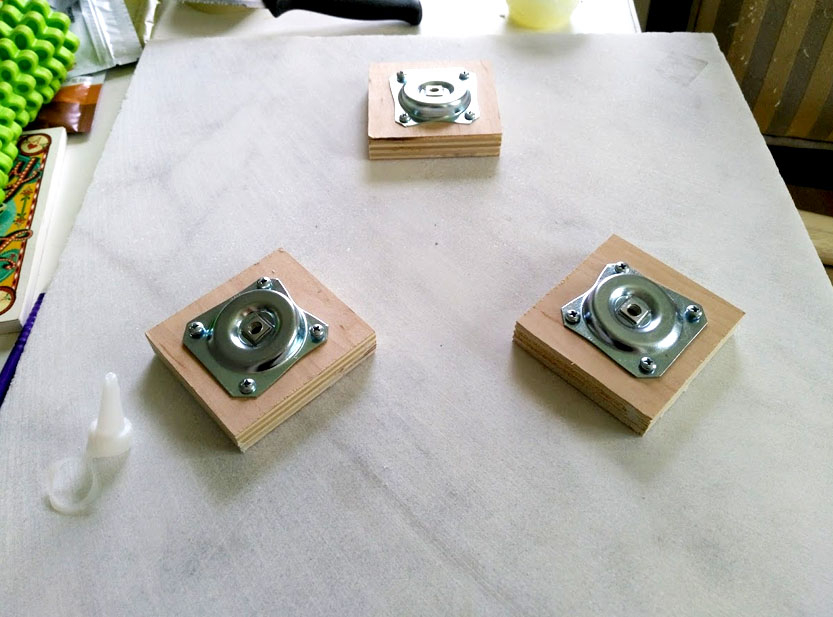
– 3 angle leg plates, $2.28 each, $6.84 total
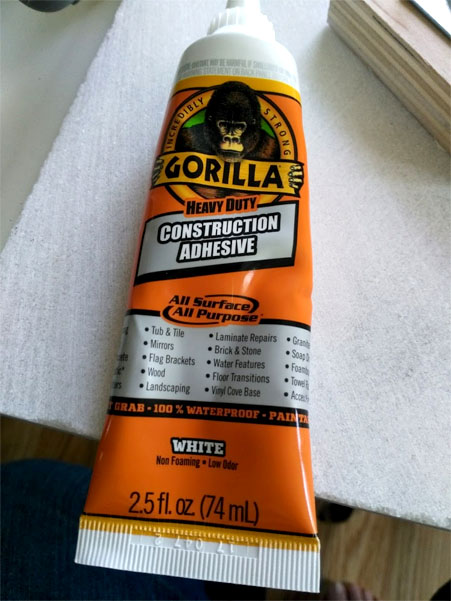
– 1 tube of Gorilla Construction Adhesive, $4.98. I used very little of this, less than $1 worth. I originally tried a different adhesive and it didn’t work that well; I highly recommend this exact adhesive if you can get it because I know it works very well.
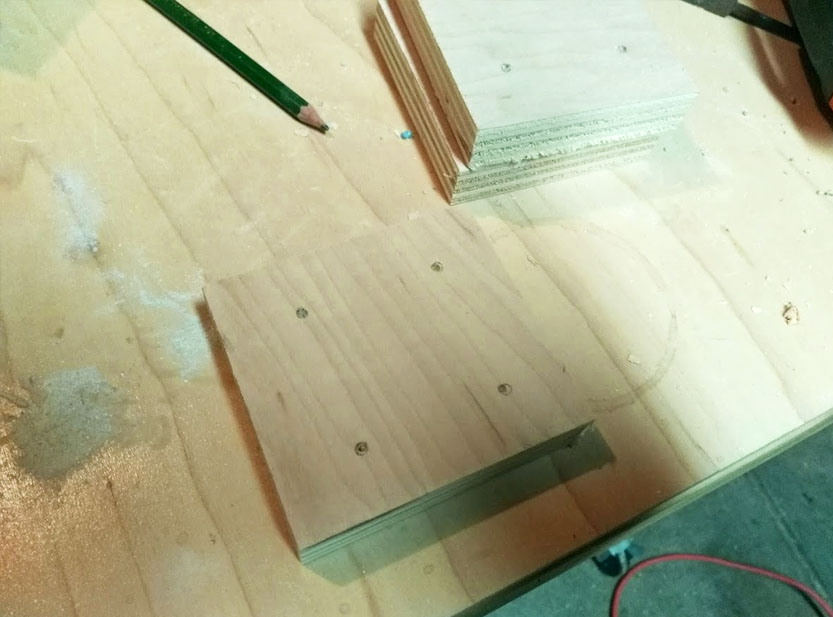
– 3 wood blocks. I actually used scrap wood, but if you need to buy wood blocks, you can find plinth blocks like this near the crown molding. You might also be able to ask for scrap. Buying plinth blocks would set you back somewhere in the area of $5.64 to $7.74 (based on the prices I saw in the store vs. the prices I see online); just make sure they’re wide enough for the leg mounting plates, which are conveniently nearby. Also make sure to get blocks with flat surfaces so they adhere properly. It’s okay if they have decorative edges; it’s the middle that needs to adhere.
The plinth blocks I found in Lowe’s
This all comes out to $45.93 if you purchase the plinth blocks. Your prices may vary a bit depending on what you can find in marble tiles, blocks, and so forth. The price of just the materials I used was more like $30.23; I know I’ll use that gold spray paint on other projects, and I’ve already used the Gorilla adhesive again. It’s good stuff.
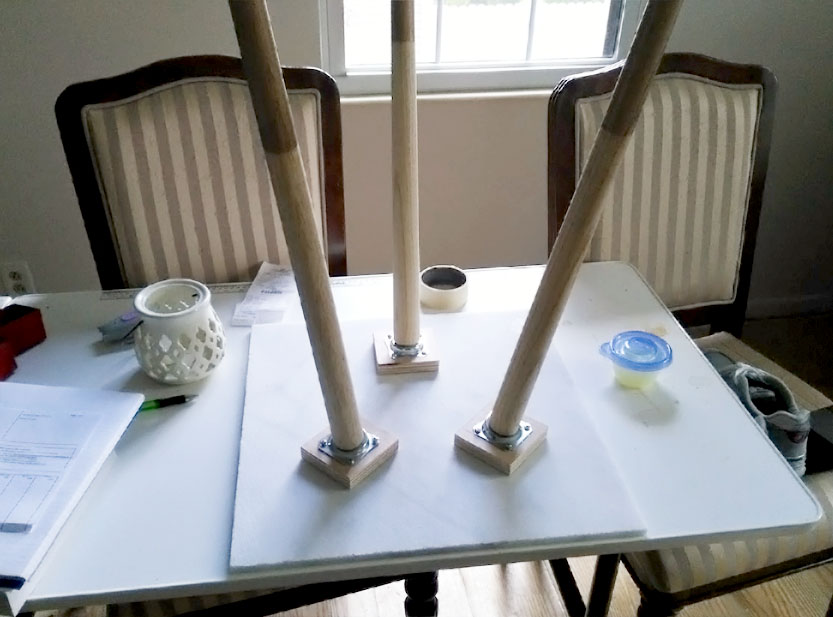
Step One: Prepare Your Legs
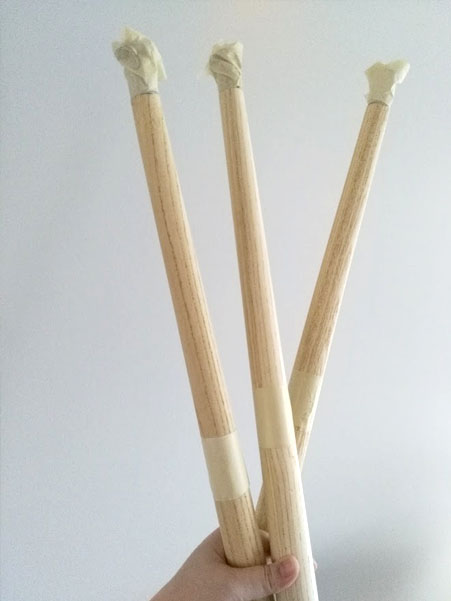
Table legs taped up and ready to paint
I wanted to paint my table legs partway with gold paint. This is optional, or you could use a totally different color paint. Tape the leg at the spot where you want the paint to stop and also tape over the hardware at the bottom, unless you want to paint that, too.
Not only did I tape up the legs like you see in the photo, but before painting, I also wrapped a plastic grocery bag around it like a skirt and taped that in place, so I wouldn’t get any stray paint on the part that I wanted to keep naked. Spray painting works best if you do a number of light coats instead of one heavy coat. This paint had good coverage, so I think I only did two coats. I didn’t love the paint that I got; it had an antique gold finish to it that was not what I was after. I may paint over it in the future. The one I used was a Valspar metallic shade.
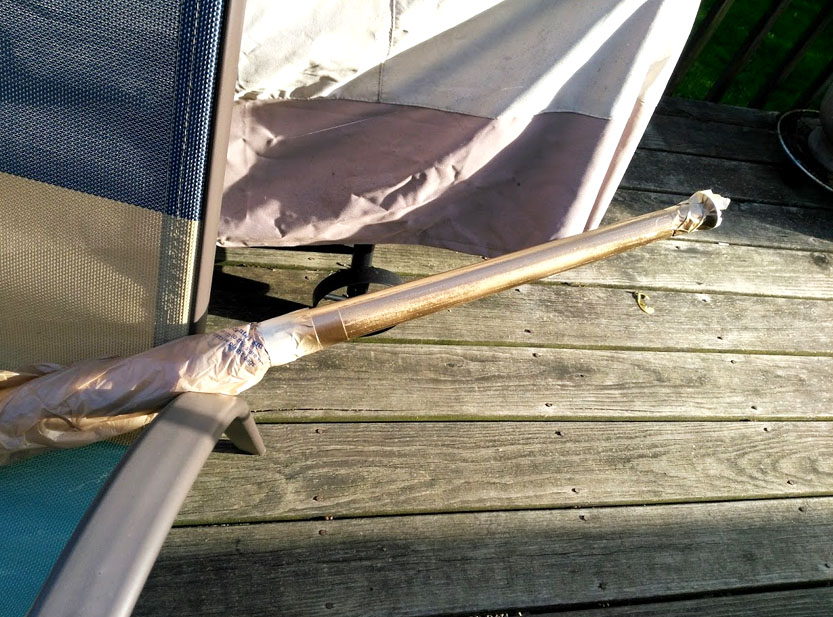
After painting, drying in a chair with its skirt still on.
Also? Have an exit plan for these table legs before you start painting. I was scrambling to find something where I could prop up the leg without the painted part touching anything. Oops.
Step Two: Ready Your Legplates
The steps are pretty easy on this one:
– Position your leg plates where you want them on the blocks.
– Mark holes with a pencil.
– Drill holes where you marked with a small drill bit. If you don’t have a drill and you want to do this by hand, use a hammer and nail to make holes by hammering the nail where you marked the block and then pulling the nail back out, leaving a hole. (Clamp your block to something for best results.) Pilot holes help you get your screws to go where you want them when you attach your plates.
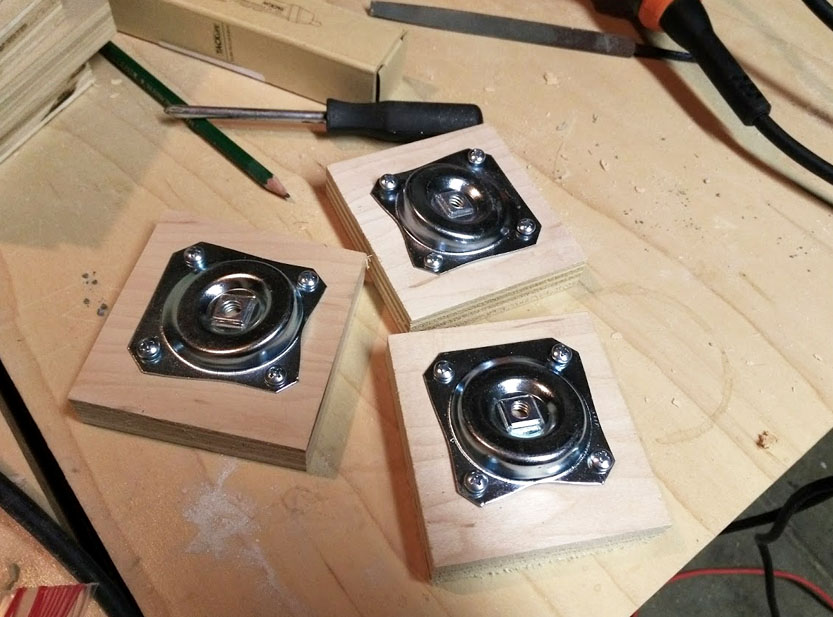
– Line the plate back up with the holes and attach with the screws it came with. Use a drill or a screwdriver to put the screws in the pilot holes. Be prepared to work harder if you’re not using a drill! It’s doable, though.
I used plates like these. They come in singles as well, but Lowe’s was out when I went to buy them.Lined up more or less center-ly, but if it’s not exact, that’s fine.My holes marked and drilled!Done. I guess I didn’t take photos of myself drilling. That was probably dangerous.
Step Three: Attach Your Legplates
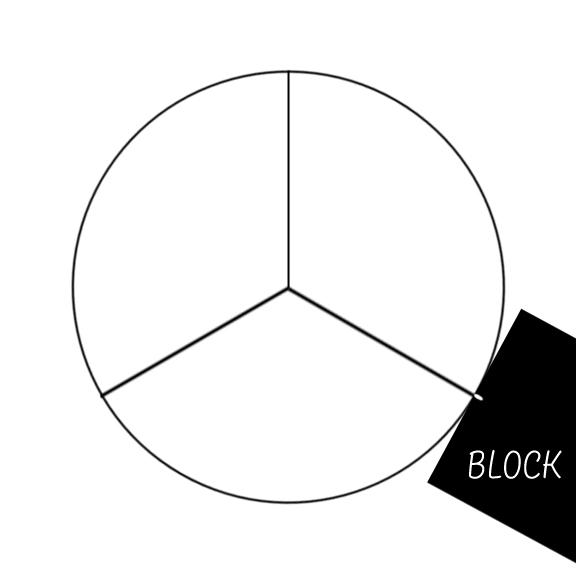
A seemingly easy thing, but I want to say that I totally did not line up my legplates right and my table is a little wobbly as a result. I wanted you to be able to avoid having to do geometry with angles on the fly (which I did try to do and which I screwed up–I am hella good at math but I guess not patient enough to get proper tools and draw things out), so I made you a template you can print out to line up your legs. You can get a 6″ template for an 18″ table top here.
To use the template:
-Cut out the circle and place it in the center of the underside of your tile.
-On your blocks, mark where the center of the raised edge of your plate is. (The plate has a higher edge and a lower edge, to make the leg sit at an angle. The higher edge should face toward the center, not the outside. Mark the center of the plate, not the center of the block. This is why it’s fine if your plates were not at the center of your block; it only matters where the plate is.)
-Line the mark on your block up with a mark on your circle; the center point should also be lined up with the center point of the circle. It’ll look something like this:
This is a very poorly drawn representation.
– Repeat for all three legs. This method should improve the spacing and angling over what I did. You could do this much more precisely with rulers and, I dunno, compasses or whatever, and better math. This is a quick and dirty method. To be honest, even with the slight wobble, my table is still super sturdy.
Once you have the spacing to your liking, use your Gorilla adhesive and glue those babies down to the underside of your tile. You will want to hold them in place according to the directions on the glue. I think it calls for a minute or so of holding the surfaces together.
Love.I did not angle these correctly at all and that’s what I get for trying to eyeball it.
Step Four: Patience
Let the glue set. It needs to cure or your table will not be sturdy. Follow the directions on the glue.
Step Five: Assemble Your Table
Once the glue has cured, you can screw the legs (heh, that sounds super dirty) into the leg plates:
Take off the tape and such. And your table is done. Ta-da!
This would have been a weekend project if I hadn’t had to hunt for my marble tile. You could probably be smarter than I was and call around, because the store I found the tile at was within walking distance of my house.
Oops.
I honestly love my table. It’s not the thickest table top and it’s rough around the edges–I didn’t do any polishing or finishing work to the tile itself–but that’s okay with me. If I had wanted a thicker table top or a professionally finished edge, it would have cost me a lot more time and money; I like the natural look of stone, so this works. (Though this reminds me: if you’re super industrious, you could call around to places that sell countertops to see if they have any marble remnants you could use instead of a tile.)
Next, I just need some better organization, because my table is already strewn with headphones and Carmex and gadgets and chargers. Sigh.
If you try this tutorial, tag me on social media or leave me a comment letting me know how it worked out! I’m @msdiscoglitter on IG and @thebooksluts on Twitter. The blog has been quieter than I mean it to be, but we have been ripping out our floors and painting our railing and lots of other household DIY. Plus, school has started again, so I’m knee-deep in reading and homework. Still, I have a lot of tutorials planned out and I’ll get to them when I can. Until then, happy DIYing!
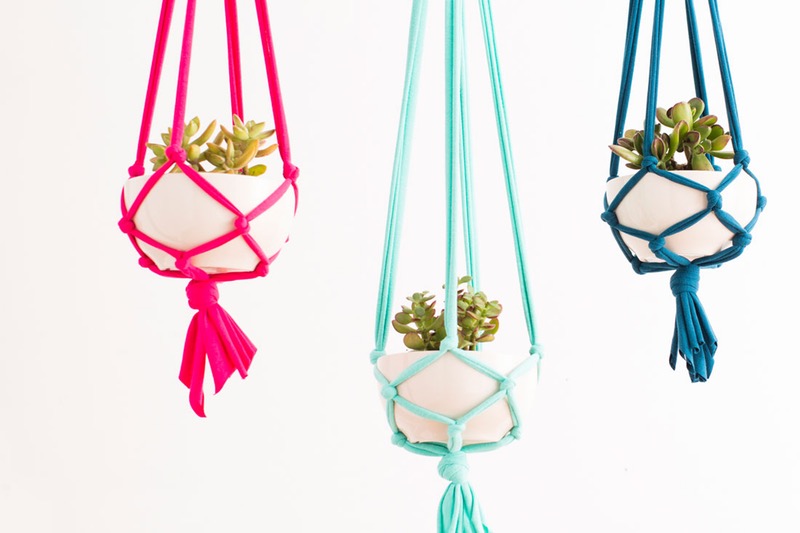
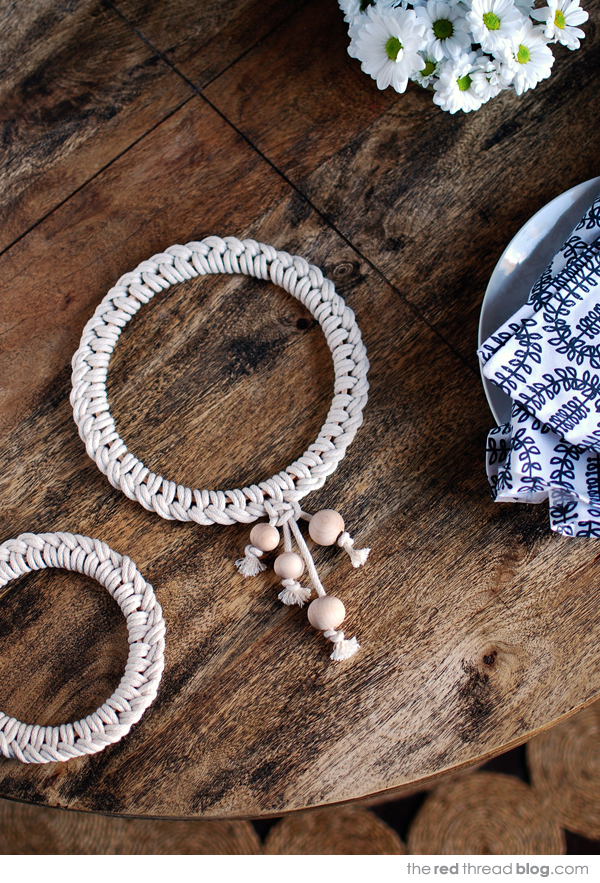
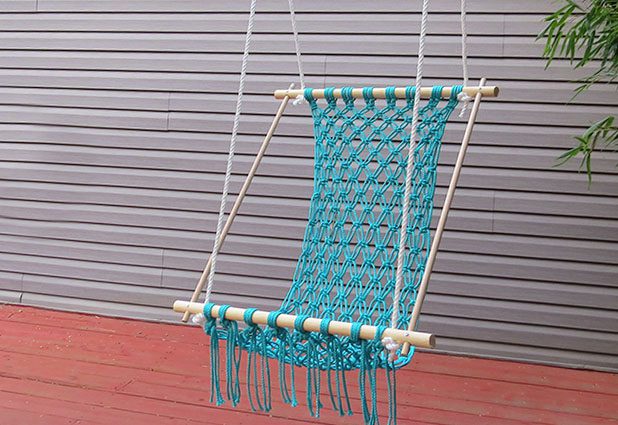
The blog has been quiet since I went on vacation last week, but I’ve been Pinterest-ing up a storm and I have a new obsession: fiber arts, up to and including macramé. I’ve dabbled in it previously–a former roommate taught me some basic knots for making jewelry–but I find myself wanting now to make big wall hangings or plant hangers. Here are the tutorials I’ve found along the way.
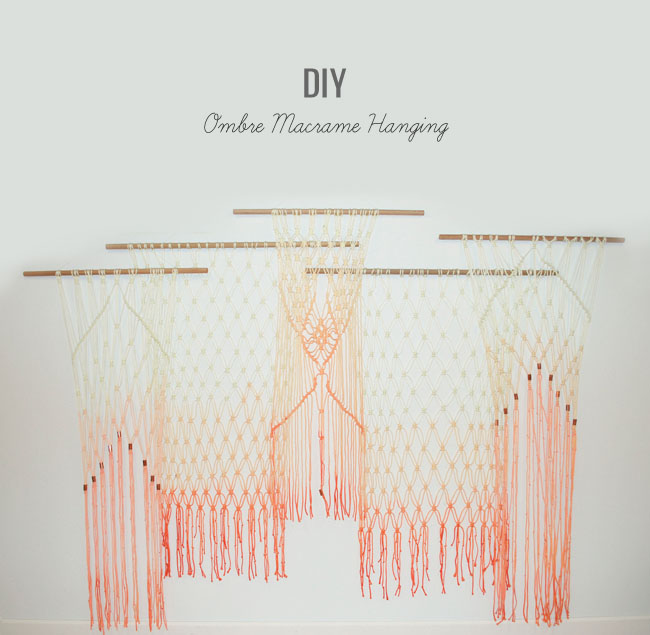
First, you can learn some basic knots from Red Heart or from Stonebrash Creative. These knots make up the foundation of your macramé products.
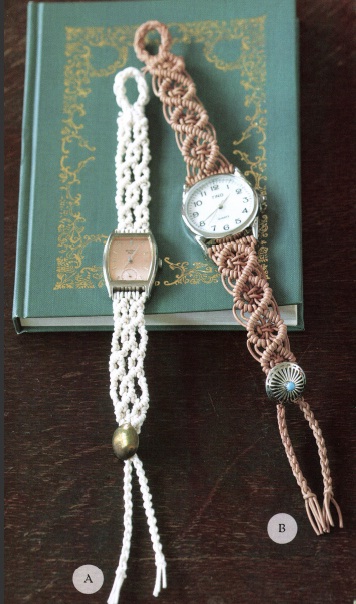
If you want to work smaller, upgrade your watchband with this tutorial from SMP Craft (changing a watch band is really, really easy and a great way to perk up a watch–I used to do watch repairs and battery changes as a job):
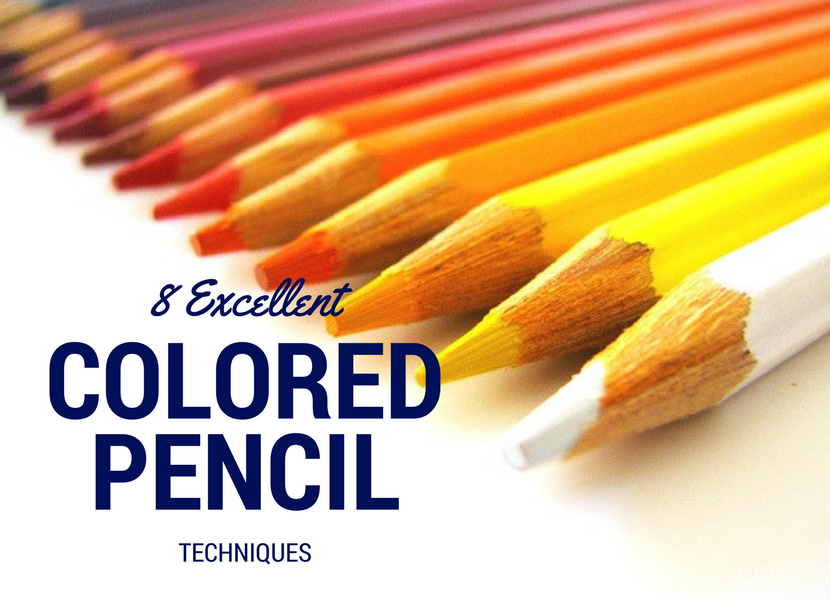
Welcome to Weekend Roundup, where I gather up all of my craftaholic tendencies and give you the best of what I find. This week, coloring techniques! Because sj and I have been coloring up a storm and it’s fun as hell, but also I like to be good at things so I’ve been trying to get better at colored pencils.
(What, you say? It’s Monday, you say? I’m a little late, yes, but better late than never!)
First: A tutorial about blending that I found really helpful. It covers five different methods of blending that anybody can do.
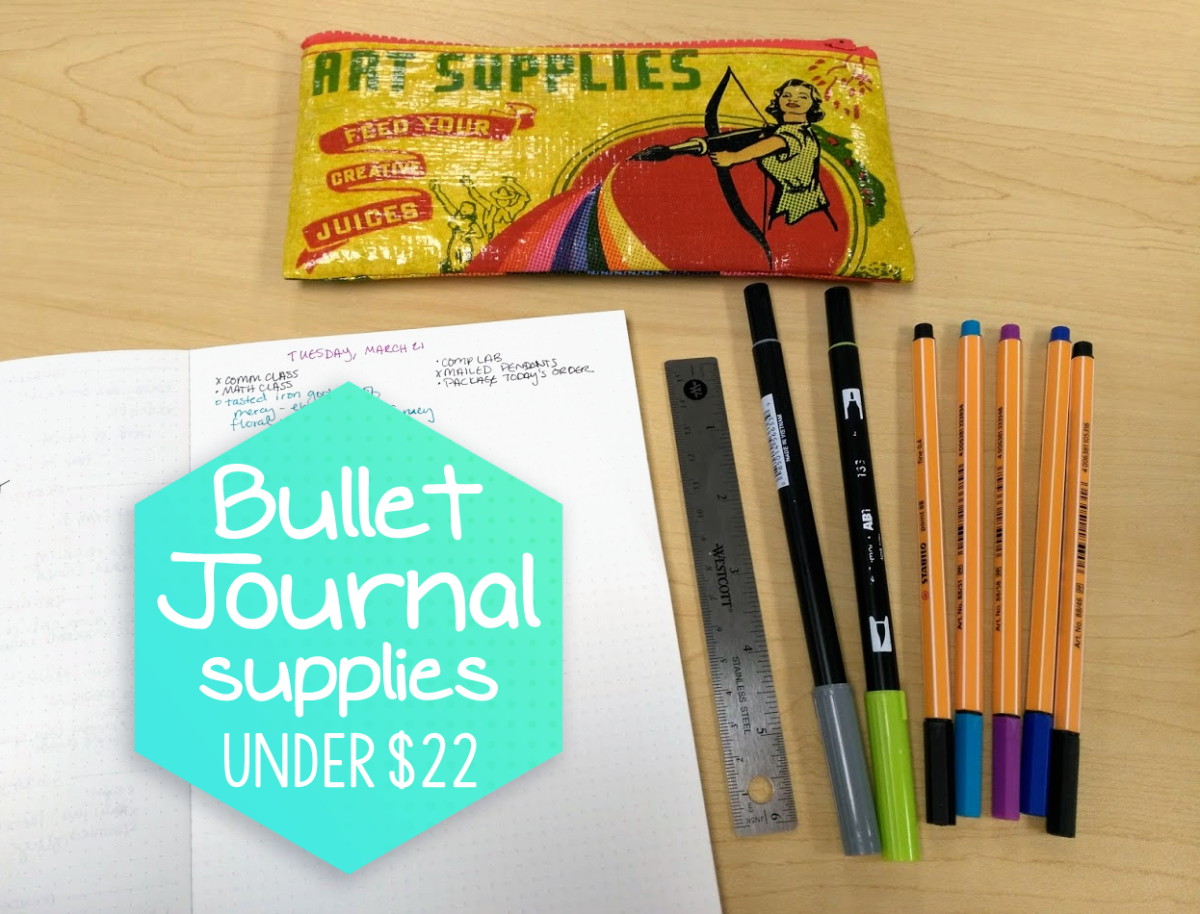
You might have heard of bullet journals on Facebook, BuzzFeed, or from your favorite highly-organized person. I am not an organized person. Not naturally, anyway–I tend to have that constant state of creative disorganization, where I roughly know what’s happening and where things are, but you would never call this feat of juggling “organized.” This was fine when I was 25, but almost ten years later, we have a mortgage and shit. I need to be some semblance of organized and on time.
Enter the bullet journal, or “bujo” for short. It’s a system wherein you take a blank notebook and fashion your own planner. You can make it as fancy or as plain as you like–I tend toward the plain, though I like to make a grid calendar for the month, which is a little fancy for a system that is mostly based on lists. Many people do whole big layouts (or “spreads”) with lots of boxes and elements, habit trackers that let you keep tabs on whether you’re doing the things you want to do as often as you want to do them, ongoing lists for things like books you’ve read or projects you’ve completed or things you want to buy, tracking goals such as saving money or going to the gym–the idea is that, because the notebook is blank, it is flexible for the things you need it to do. (Get a more coherent overview at the bullet journal site and prepare to fall down a rabbit hole of wanting to be more productive.)
My bullet journal is pretty plain, honestly. I have a calendar for the month and my daily lists of things to do. I use the opposite page for a running to-do list and sometimes meal planning. I find that it helps me a lot, though. I have issue with executive dysfunction–aka, my brain is not always good at arranging things into do-able steps so that I can then do the things–so a space to write down what I want to do corrects for some of that.
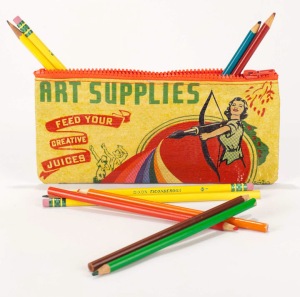
If you’re familiar with bullet journals at all, you know that people get really into them. Like really-really. The feature image for this post says that you can get all the supplies in the photo for $22; some people spend that on one notebook. I’m certain that it’s a fabulous notebook, but I do not have that kind of spare income for a notebook. Bare minimum, you could always get started with just a plain notebook and a pen and spend literally just a couple of dollars; however, I found a few supplies that are both enjoyable and inexpensive, which I think gives me a good cross between value and fun-itude (that’s … not even close to a word, I’m sorry).
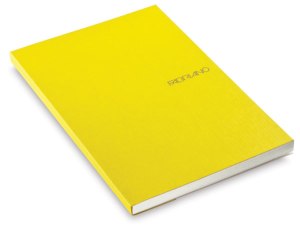
A lot of serious bullet journalers use the dot notebooks from Moleskine and Leuchtturm. These notebooks are great, but they also come with heavier price tags. I found the Fabriano EcoQua at Blick’s (where I actually bought all of these things in person, so I didn’t factor in shipping costs). I liked that it was dotted, bright yellow, smaller than the composition book I used for my first bullet journal, and that it was around five bucks. I didn’t love the fact that the covers are not glued all the way on; I worried that, with regular use, pages might start to fall out without the spine reinforcing it. That hasn’t happened yet, though, and I’ve been using it almost daily since January.
It also comes in red, green, orange, black, and gray, in case bright yellow is not as exciting for you as it is for me.
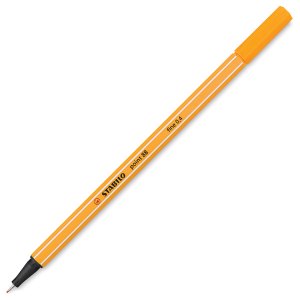
I love this pen. I love it more than the Staedtler fineliners, and that’s practically blasphemy among the bullet journal crowd. I have four different colors of these that I use for my bullet journal. You really only need one, but at less than a dollar a pen, I could afford to have a couple of different colors. I use black for my actual content (hence why I have a spare), purple to write down what day it is and to note special things in my calendar, blue to mark lines between days, and aqua/turquoise to note special things in my daily logs (eg, if I had lunch with a friend, I mark it with a heart and their name in aqua; if I ordered something online, I mark the day I ordered it so I can remember to expect it; etc). These pens work great, don’t bleed in the Fabriano notebook, and I like that they’re orange and hex-shaped.
6″ Ruler, $2.47. I just like having a ruler to make grids and lines. I inevitably forget that my finger has mass and ruin at least one line in my calendar every month, but that’s here nor there; this ruler is good because it’s small enough for my pencil pouch and has cork on the back to prevent slippage.
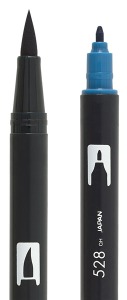
I admit it: I only even bought a brush pen so I could have a chartreuse pen. I don’t even really use the gray one in the feature image up there. I used it a bit when I first bought it, but I mainly now just use the green one for highlighting or making the lettering on my monthly calendar look . . . well, “pretty” is a strong word. I suck at lettering.
I saw this at the last minute by the checkout when buying my bullet journal supplies, and I did the heart-eyes face in real life. Sure, there are certainly less expensive pencil pouches if you want to go super-budget, but if you decide or are able to splurge a little, Blue Q pouches support the Nature Conservancy. They also have lots more rad designs if that particular one doesn’t blow your bubble.
That’s it. That’s my whole bullet journal rig (plus two brush pens I honestly barely use) for $22. Got your own bullet journal secrets? Let me know in the comments, I’d love to hear!
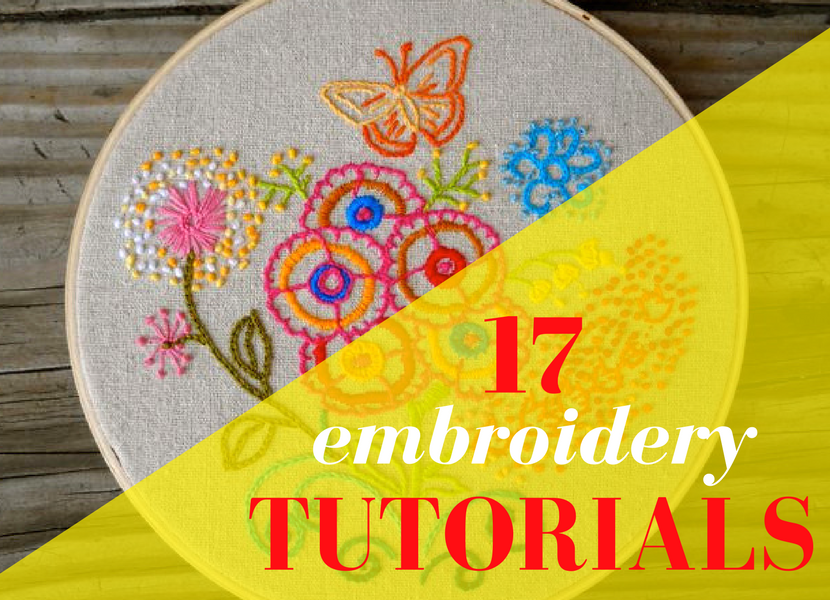
Welcome to Weekend Roundup, where I go down a rabbit hole of craft addition and resurface with a bunch of tutorials and tips articles on a theme. This week is one of my fave new hobbies, embroidery. I’m not that great at it yet, but I’m enjoying the heck out of it; even better, it’s really inexpensive to add to your craft arsenal! How many crafts can you say that about?
We bought all the items we’re reviewing; we have not been compensated in any way to review. I, Susie, did receive a refund on the Laneco pencils due to dissatisfaction. We may receive money from affiliate links at no extra cost to you.
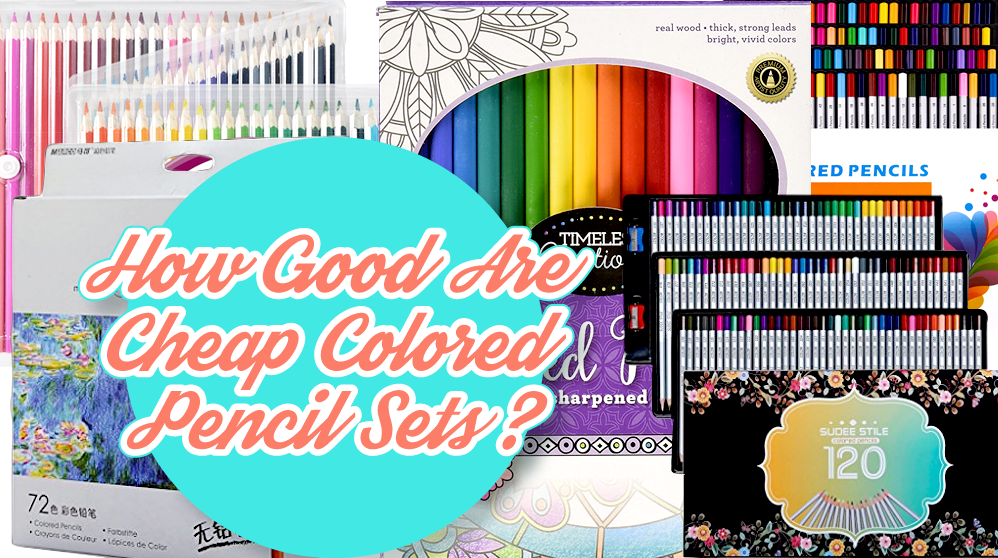
Coloring has been such a craze that there was supposedly a shortage of colored pencils; you wouldn’t know it, though, from all of the different options available out there. Which cheap colored pencils are good? We reviewed five brands to find out.
Things I liked: The amount of greens and blues, the harder wax for lighter application of color, nice for ombres and shading, good blending
Things I didn’t love: The awkward plastic case, no color labels at all, only ONE YELLOW COLOR (??!!!? – those other yellowy colors were oranges), the number of muddy brownish colors, three almost identical reds
Overall, I do like this set okay, with a caveat: I color with a light hand, and I like being able to put on really light applications of color. Some of the softer wax color pencil sets I’ve used don’t allow for that as well. I don’t know if it’s the BEST set value, though the lower price certainly does change my perspective on it a bit.
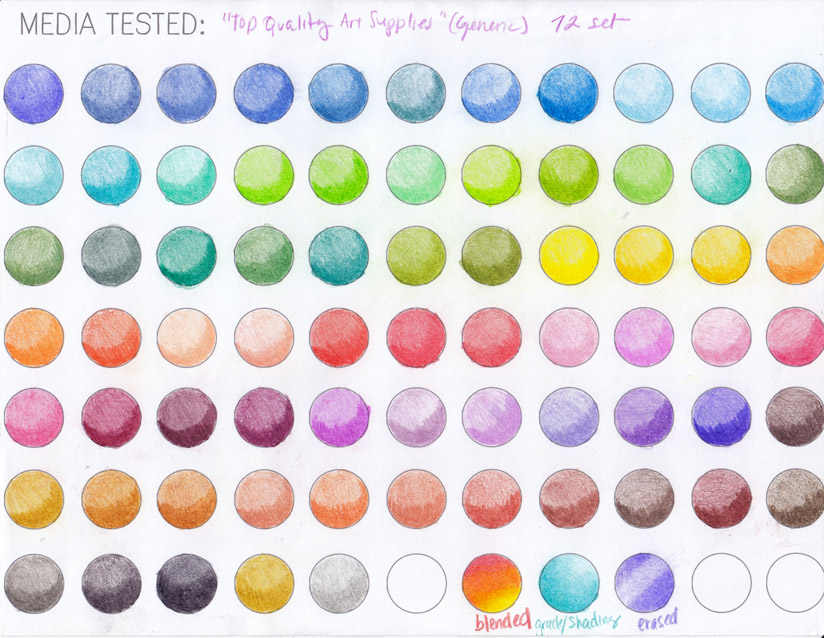
Here’s my color swatch. I laid down a lighter layer and then did the “shading” with as heavy as I could color in. It’s messy, but 72 is many bubbles to color:
ONE YELLOW, ARGH. But so many greens!
These pencils definitely didn’t all saturate a whole bunch, but a lot of them did. I actually liked them better the more I colored the swatches, enough that I went to Amazon and added an extra star to my review. And look how many greens! So many! It would also be good for skin tones, with all the browns. For $8.99, if you color similarly to me (lighter pressure, lots of gradients) and you like the colors, I can say they’re not perfect but I’d actually buy them again. They also blended the best of the three I used.
What I liked: Unlike Susie, I press hard when I colour. I like to make sure everything is filled in, and if I’m colouring, I want those colours to be as vibrant as possible. Instead of typical blending from one colour to the next, I colour on top of the other colour until I get the exact shade I want. I’m working on this, cos it’s not really that great a strategy. These were great for my style of colouring. I also like that they have the typical #3 pencil hexagonal shape. I have arthritis in my hands, and can sometimes have a hard time gripping smoother barreled pencils. They stood up to a lot of abuse from me. I also liked that each pencil has a number to indicate the colour, and the numbers progress logically.
What I didn’t love: Oh man. The box they were shipped in was awful. It was the thinnest cardboard imaginable with no real padding. This led to a ton of broken tips when I opened them AND meant that a lot of them had shattered cores that I only found out about once I tried to sharpen them. One of the pencils was worn down to a two-inch nub after trying to colour in the background of just one page. I absolutely love them, but would not purchase again if they came in the same packaging.
I tried to show what each pencil was like with soft, medium and hard pressure in the swatch I coloured. I totally forgot to label those things on the bottom right, but they are blended with just the two colours, blended with a white pencil and then erased.
Srsly, 72 colours and not a single true red?
Here’s a page I coloured using just the Raffines:
96 pcs but only 48 colors.
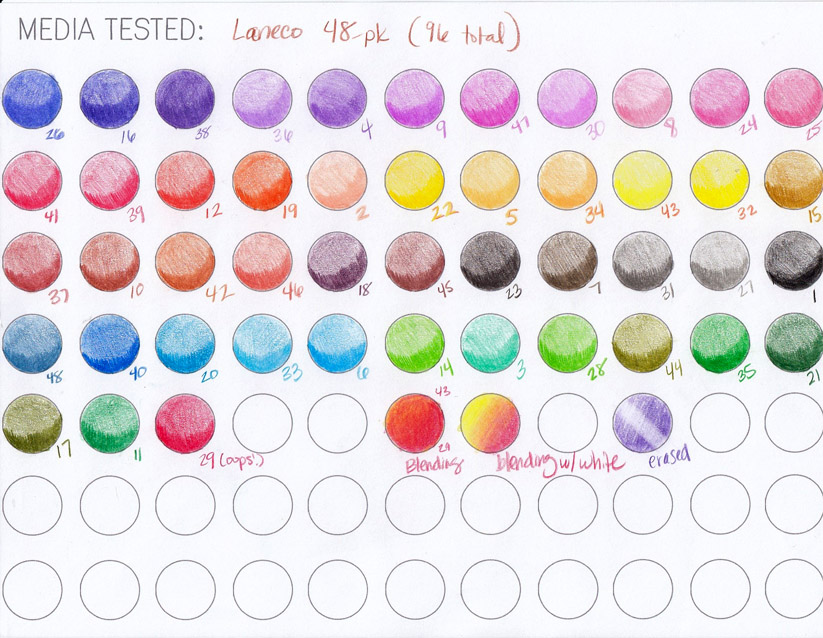
Laneco “Soft Core” 48 pack (comes with 2 packs), on sale for $12.99 (regularly $70.99? Supposedly? Not even worth that much tho), reviewed by Susie
~ $0.14/pencil, 2 of each color
What I liked: Eh? They’d be really good for people who color with solid fills. Multiple yellows! Bonus pencil extenders were nice.
What I didn’t love: How they felt like drawing with lipstick. I found them hard to blend and hard to lay down consistent color when coloring with medium-to-light pressure. Also the packaging. They came in a big box with flimsy trays inside that were hard to get pencils in and out of.
I did an unboxing video just because I found the packaging really unusual:
These look a lot like the Raffine Marco set. In regards to softness: I have a range of pencils in different brands because the Blick’s near me sells single pencils; I have a couple of Polychromos pencils from Faber-Castell, which are “soft” too, in that they use minimal wax blended with oil. These Laneco pencils are not “soft” in the same way; to me, like I said above, they felt more like drawing with lipstick.
I also didn’t love how hard it was to blend them. You can see in the swatches below that I actually had to start another bubble and try really hard to get a nice blend, and I also had to use the white pencil (which I don’t normally do for blending).
I was so disappointed that I reached out to the seller. Laneco issued me a full refund, so they do honor their money-back guarantee. I don’t see myself using these regularly and will probably give them away. (I wanted to ship them back but it would cost me almost ten dollars. Nooope.)
Considering that it’s two packages of 48 instead of 96 full colors, I don’t think this is the best value possible for $12.99 by far.
Color swatches:
I had a really hard time getting consistent layers with many of these. Also, the lack of aquas, man.
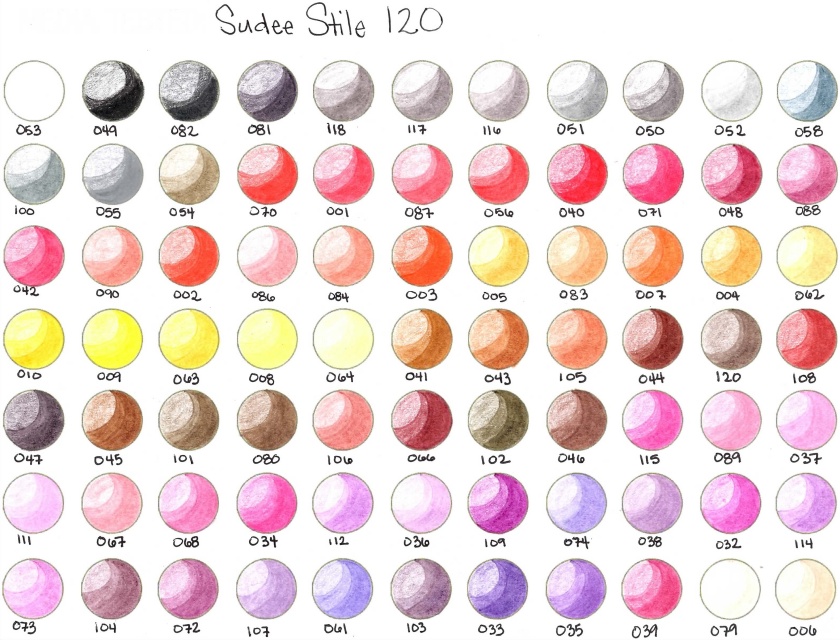
What I liked: These are A LOT like the Marco Raffines I reviewed above. A lot. Like, almost the same in how they colour. So all of the likes I mentioned above apply here, as well.
Something else that needs to be mentioned, though, is how amazing the Sudee Stile customer service is. Before the pencils had even arrived, they messaged me via Amazon to let me know that they were working on perfecting their packaging and asking if I would please let them know if I received any busted pencils, and that they would either replace or issue a partial refund for anything their shipping was lacking. Like, wat? Are you kidding me? How awesome is that?
What I didn’t love: The colours come in some random order and the numbers make zero sense. I had to rearrange them into something approximating ROY G BIV, or it would have driven me insane. You’ll notice on my swatch (uh, if you bother to count, that is) that it’s not really 120 colours, it’s 119. I received duplicates of one colour (luckily, it’s a pink, so it’ll get a lot of use, anyway) and did not receive one colour at all. A few of the tips were broken, and one pencil refuses to sharpen at all without immediately breaking. So that kind of sucks. One of the pencils is not labeled at all, but through process of elimination, I was able to figure out which one it was.
BUT, I messaged the seller once I had discovered this, and they repeated their offer to replace the pencils or issue a partial refund. I got $4 back, which brings the price of these down to $19.99 (or ~17¢ a pencil). And that’s pretty great.
Here’s the first bunch of colours. LOOK AT ALL THOSE REDS AND YELLOWS! [Susie: WAY TO BRAG ABOUT ALL YOUR YELLOWS, sj!]I totally forgot to blend or erase, but these do both really well.
So, the case these come in is great for shipping, but a little unwieldy for actually seeing the colours as you want to use them. This, however, would not keep me from purchasing these again, especially if they stay around the same price they currently are.
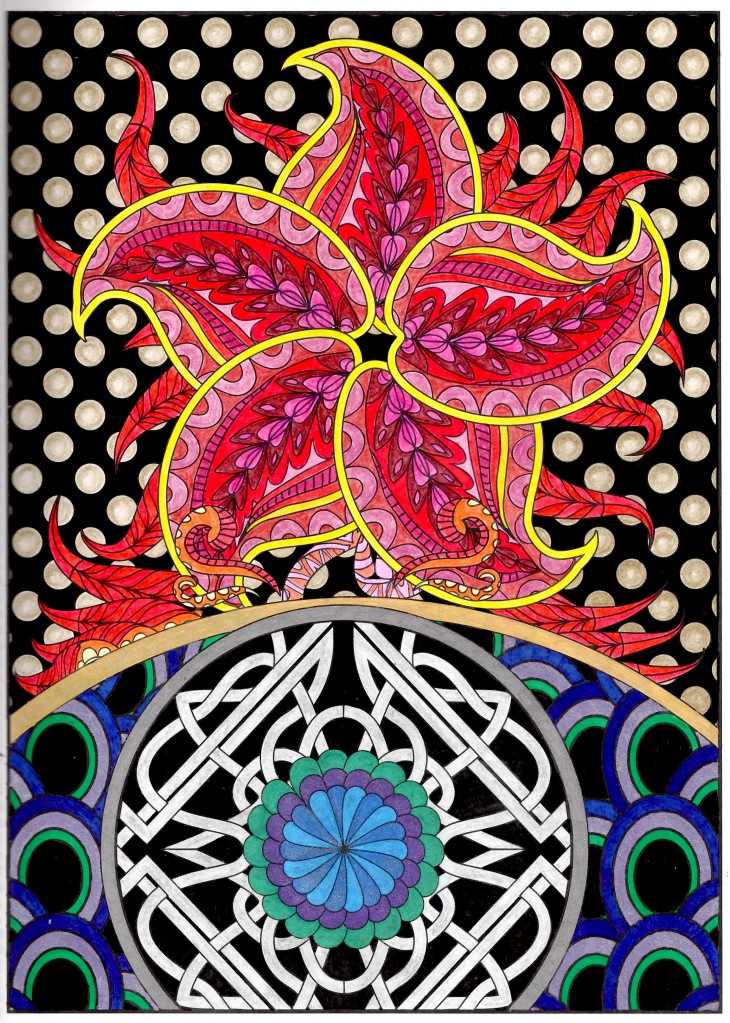
Here’s a picture I coloured with them, the top part is almost all pencil (except for the black), and I only used a light to medium pressure to achieve these tones.
What I liked: I actually really liked this set more than I expected! What colors it had were curated well and the colors saturated pretty well, for the most part.
What I didn’t like: I’m actually pretty pleased with these for $6 or $7 dollars at Kroger, to be honest. They don’t erase well, but they erase enough for my purposes (sometimes I use my eraser for effects and such).
This isn’t my first experience with Cra-Z Art pencils, though I was a little taken aback when I looked at Amazon and found out that these are Cra-Z Art since it’s not apparent from the branding. I’ve said to sj that I actually really liked my first cheapie set, so it’s not a surprise that I enjoy these, as well.
If you’re looking for a cheap and fast in-road to coloring, I would definitely recommend this set. These are available at a lot of stores (even grocery stores, apparently!), so you could pick them up in person. They blend well, they shade well, and they have a nice curation of colors that you might choose as an adult. I’m going to be moving these pencils into heavy rotation ASAP.
We hope these reviews helped at all! If you’ve had experience with these sets, or if you decide to buy one, let us know in the comments!
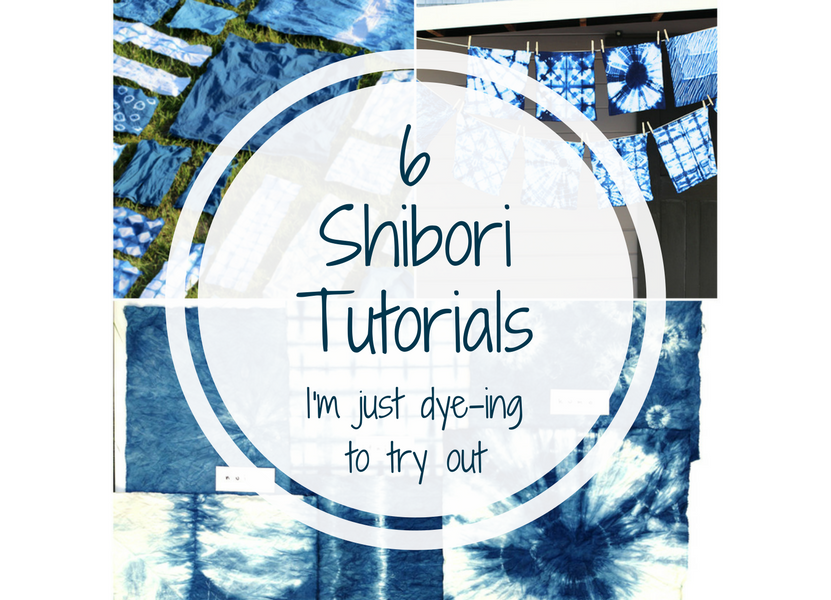
I wanted to try to start doing roundup posts (though I can’t promise one every weekend) because I fall down a LOT of craft-tutorial rabbit holes. I’m not the kinda girl who wants to look at one tutorial and do what’s in the tutorial; I want to look at as many tutorials as I can find until I really have a grasp on what I’m doing. I will watch so many YouTube videos.
This week, my research topic has been Shibori fabric dyeing techniques. Shibori-dyed fabrics are similar to tie-dyed fabrics, but with a lot more different variations of techniques. The overall concept is “resist” dyeing, or blocking off parts of the fabric so that they don’t get dye on them and other parts do, making a pattern with the dye. Psychedelic tie-dye isn’t everyone’s style choice, but Shibori patterns can be more subtle and fit many different styles.
Without further ado, here are some awesome tutorials I found that will help you learn all about Shibori, too!
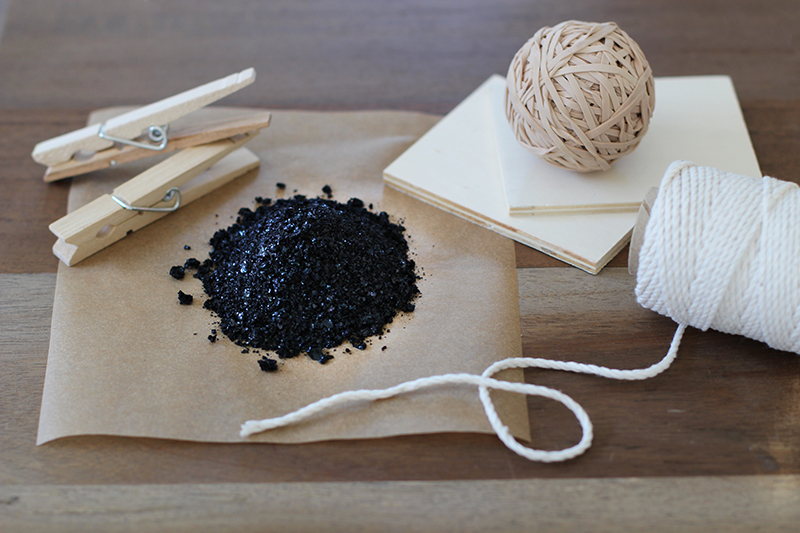
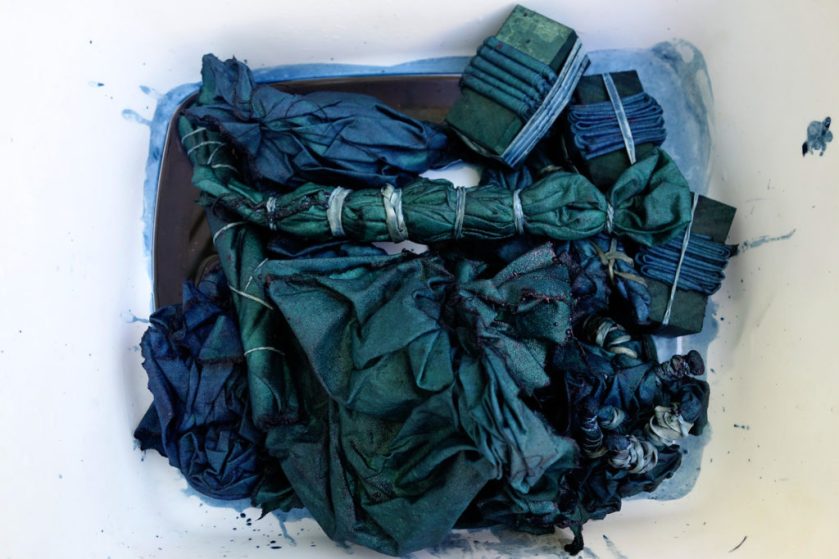
image from Honestly WTF
DIY Shibori from Honestly WTF. This is a really good start-to-finish tutorial that goes over how to work with the dye (a little bit less straightforward than Rit but nothing to panic about) and some cool techniques to use. Fun fact I learned from this tutorial: Indigo-dyed cloth looks GREEN until it oxidizes!
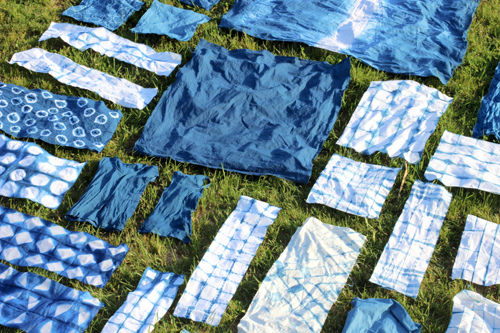
image from Seamwork Magazine
Shibori Dyeing from Seamwork Magazine. This tutorial explores a lot of traditional Shibori techniques, including the Japanese names for the techniques. This article has fun facts about dyes and some techniques not covered in the first tutorial.
Shibori With Stitch Resist (Video Above). Another way of making patterns with thread. The pattern for the orange design isn’t shown in the video, but there’s a PDF with instructions under the video.
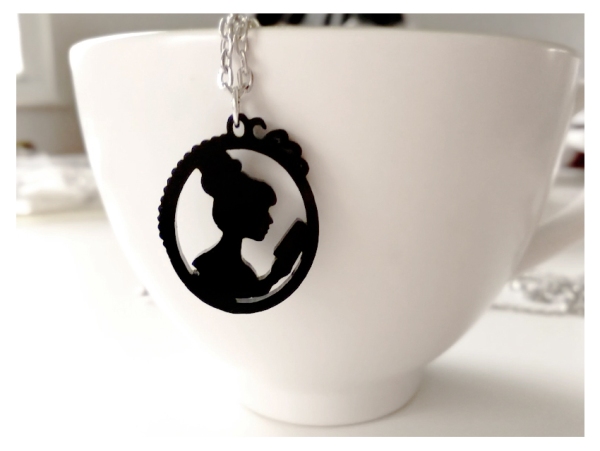
I thought, hey, why not show everyone that they, too, can make inexpensive pendant chains?
Okay but, for real, I’m sorry that I did not speak more clearly in this video. I will do better. I’m new at this filming business!
I needed to sit down and make pendant chains because I was listing this pendant right here for sale on Etsy:
Which you can get here if you want it, I dunno if you like to wear things on your neck. I will have these in stock until I run out and then . . . we’ll see? (This is why I’m not really a businessperson.)
Anyway, I thought, hey, why not show everyone that they, too, can make inexpensive pendant chains? I think these will come out to between 1 and 2 dollars each. (The ones I made were actually about 70 cents each, but it depends on what you can find at your local craft supplier, so I don’t want to oversell it.) The chain I used is super sturdy, too–it’s not the really flimsy type that will break if you breathe on it wrong . . . though if you like the more delicate chain, I’m sure you can find it!
If you would like to learn other versions–like ribbon, cord, etc–drop me a comment here or on YouTube and I will film that, as well. Happy crafting!
I’ve been poking around Skillshare for two months. Would I pay full price to keep it?
I was not paid to review Skillshare or given anything in return for my review.
I tried Skillshare when I saw an offer for 3 months of premium for $0.99 on a YouTube channel I follow (the channel is Drawfee, and it is hilarious, FYI. Highly recommend if you like humorous videos). I am a video tutorial addict; I’ve been getting my fix on YouTube for years, and I’ve armchair-learned so many skills that I will probably never use. If Skillshare is 100% compatible for anybody, it’s me.
And my answer to whether it’s worth the premium price is a resounding “maybe? if you have eight-to-twelve bucks that you literally don’t care about every month?”
The Pros
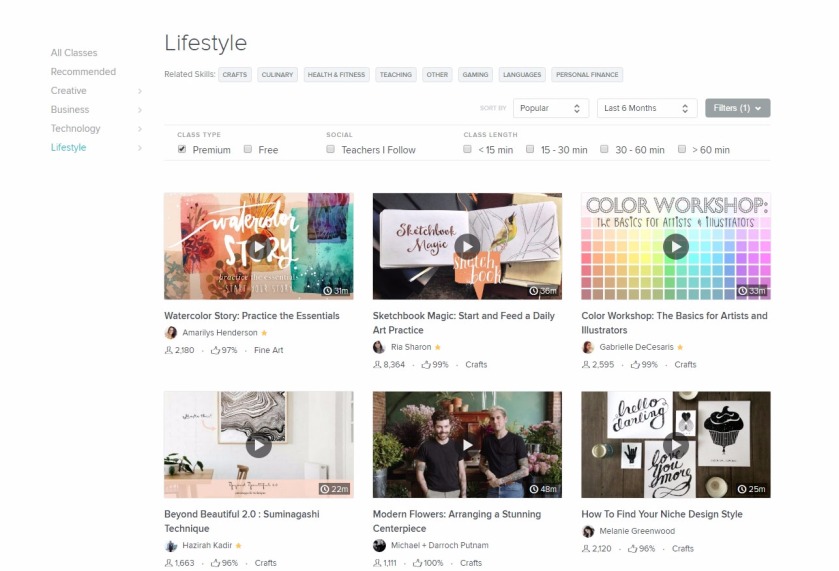
The video layout for a category on Skillshare.
Definitely there are a lot of good things about Skillshare. The average video quality of all of the classes I’ve taken or previewed (probably a good 10 – 15 at this point?) has across the board been better than the average quality I find on YouTube–not to say that there aren’t great quality tutorials on YouTube because there definitely are, just that you aren’t guaranteed a great quality video. (As I look deeper through some of the categories on Skillshare, I’m actually also finding videos that aren’t that great of quality, too. So it’s more of a mixed bag than I initially thought.)
I also really enjoy the class format because I don’t have to go hunting for videos for the next step in a project, or wait for the next video to come out when the person gets time to film it.
Another pro is that Skillshare seems like it probably has been hustlin’ to get some good talent on its site that YouTube hasn’t attracted (maybe by paying more?). Famous brands like Pixar and Good Housekeeping have classes on the site. I watched videos by a great watercolor artist named Karina Eibatova, a “designy illustrator” named Mikey Burton (he was my fave teacher, hands down), and weaver and author Rachel Denbow. I loved all their classes and you could tell they were professionals in their fields.
A cool video course I took. Underneath, there is a place for feedback, discussion, and to upload your own projects based on the course material.
I also found some cool business-y courses (though more on this in a minute). I could have used more of this type of course, to be honest, but I found a couple of courses about how to launch a t-shirt business and how to integrate batch-sewing into your workflow so you could run a sewing business out of your home, which sounds jargon-y but is a very useful skill. Mo’ sewing = mo’ money, am I right?
The Cons
I actually can find tutorials that cover a lot of the same topics on YouTube for free. At $96 to $144 a year, that’s a pretty big incentive to do my own research . . and honestly, on YouTube, it’s not difficult. Skillshare is about six years behind YouTube as an entity and is lesser-known; Skillshare boasts 15,000 classes, and granted, they’re generally high-quality, but a quick YouTube search of “tutorial” brings up 181 million results. It’s almost impossible to run out of things to learn on YouTube and there are some really professional teachers making quality videos there, as well.
Skillshare also promises “professional skills” but I saw a whole lot of basic classes on there. There was a class on how to knit a scarf in garter stitch and a class on urban sketching; I didn’t see nearly as many intermediate or next-level classes or specific business skills that I couldn’t learn from literally anybody who has a “business skills you need to learn for your home business” post. I also saw a lot of “productivity hack” type courses, and I feel like probably not all of those people are actually productivity experts. If I’m paying for access, I’d prefer higher levels of vetting and curation from Skillshare. I can get “experts” who think they know everything about productivity on YouTube. *s*
Some categories are almost nearly empty. When I checked IT Security a couple of hours ago (or maybe it was last night, but I think it was today–I only just finished my first cup of coffee, forgive me), there were no videos in it. Now there are three, and I . . I’m not an IT Security expert but I don’t know that these videos really fit the topic?
And what the hell is Facebook group domination and why do I want to do it??
It’s also not as easy to find things as I’d really like. One of the things that Skillshare could have up on YouTube is the ability to browse sections and find skills I didn’t even know I didn’t have, but videos are not always sorted into appropriate categories. For example, “Culinary” and “Cooking” had about five videos each when I clicked through, but I knew I had seen a lot more on the main “Lifestyle” page. Sure enough, a quick scroll through the main “Lifestyle” category immediately brought up a lot more food videos. (All of which were basic cooking stuff, just in case you’re curious.)
Then there are the scammy videos. I really wish Skillshare did a better job of curation, frankly–both at categorizing videos and keeping scammy classes like “Free Unlimited WiFi Trick at Cafes and Malls” or “How To Access To The Deepweb”[sic] at a minimum.
The Verdict
I . . . don’t really care if I continue to use Skillshare? It’s a thing that is neat but not in any way indispensable to me. It’s definitely not worth $12 a month to me, or even $8/mo if I pre-pay for the year; the classes aren’t rigorous enough to justify paying that much for it. Once my 99-cent months are up, I’ll probably cruise it every now and then for free content. It’s going to be a lot more helpful for people who are just starting out with a skill, but even then, you will probably quickly be looking for other sources of information.
That said? If you can get some free months or get the 3 months for $0.99 deal, it’s definitely worth poking around a little if you like learning skills. Skillshare lets people have a referral link and earn free months by giving out free months, as well; you can get a free month of Skillshare Premium from my referral link by clicking here. (This will give me free months, but like I said, I don’t really care if I continue to use it. So if you would rather seek out the 3 months for $0.99 deal, go with my blessing.)
TL;DR: totally okay but I’m not into it enough to pay full price for it.
Have you used Skillshare? I’d love to hear your thoughts on it in the comments!

 I read a lot of faerie tales and myths as a kid (okay, I still do), and was particularly into the HP Lovecraft inspired Cthulhu Mythos for quite a while as teen. As an adult, I especially enjoy reading other authors playing in that sandbox cos I legit love the idea of shared universes that anyone can write in.
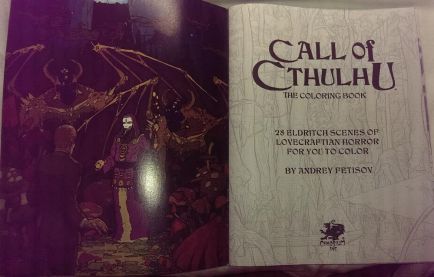


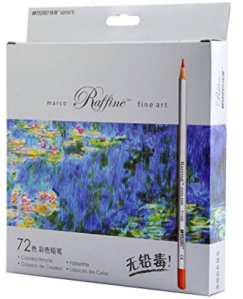 72-color Raffine Marco Fine Art Colored Pencils
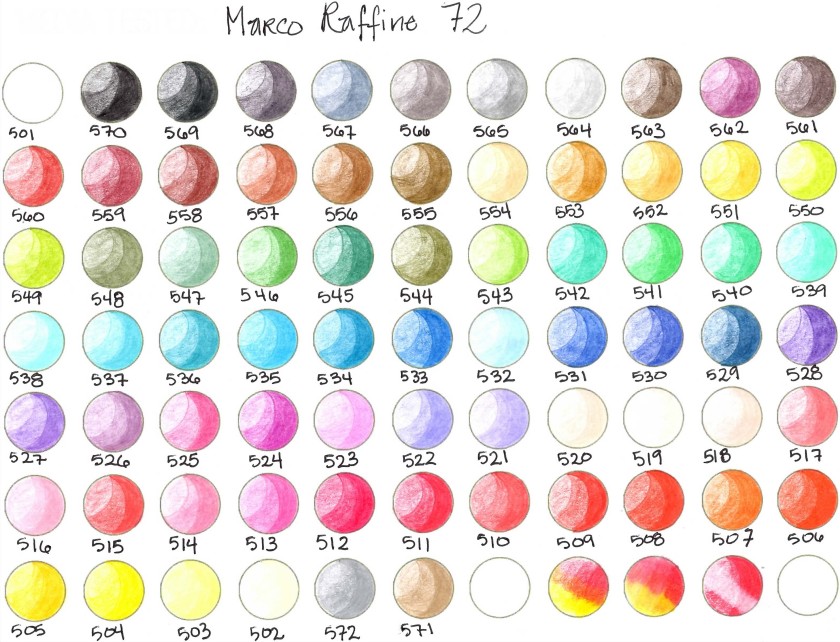


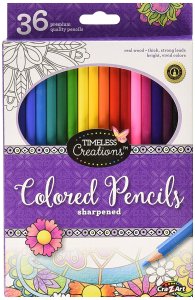 Cra-Z-Art Timeless Creations Adult Coloring Set
![Tutorial: Make Your Own Cheap Pendant Chains [Video]](https://madeitmydamnself.files.wordpress.com/2017/03/tutorial-pendant-chain.png?w=850)